Adsense

A bit of music from the lamented Radio Blog Club

Le Français

Toujours, je suis désolé pour mes amis( et amies) français(es), mais il est difficile pour moi d'écire en français. Peut-être un jour...
S.V.P. regardez ce LIEN
Showing posts with label Developments. Show all posts

Saturday, February 10, 2007

Fulvia Developments - Part IX

Attenzione! Officer present!

The previous articles endeavoured to offer some practical suggestions for Fulvia engine development. They were meant to provoke thought rather than to provide all the answers.

Now I propose to wander into the land of dreams, the place where the lottery win finally came and where the budget is no longer a factor, a place where the ale is real and good and cheap, where there are no speed cameras or traffic wardens, where all Fulvia spares are available off the shelf, where the women – oops! I was getting carried away...

The suggestions I make here will horrify many traditionalists, but I don’t care; these ideas are the results of hundreds of hours of thought and discussions in pubs… They are mostly intended to address some of the limitations I pointed out when I started this series. I hope at least they are interesting.

I would first set out to mount the engine vertically. This is possible, I know because I once “mocked it up” - the bonnet would just shut. I would scrap the original crankcase; it is structurally far too weak and there is a distinct lack of support for that all-important centre main bearing. I would have a new one machined from a block of suitable aluminium alloy such as HE15 or 30. All the main bearings would be fully integrated into the structure; the caps, a precise fit into the crankcase, would be arranged in a one-piece “ladder” and cross-bolted. There would be a dry-sump installation, with two scavenge and two pressure pumps – one of the latter being solely for the centre main and its associated circuits. The piping could be external.

I would probably opt for a different bore and stroke from original; of course this would have to be drawn up, but probably around 85mm x 70mm to give 1589 cc. This would provide an additional 7% of piston area for about the same capacity as an original 1600. I would have the block cast in aluminium with Nikasil coated bores. There would have to be a special crankshaft of course; this would have a 60mm diameter centre main bearing since the original has insufficient area; the crankshaft would be made from EN40B or 40C steel and nitrided to 0.040” (1mm). I would arrange for a ball race on the other side of the timing sprocket to provide proper support for the front of the crankshaft. Pistons would be as light as possible and the rods would be titanium to improve balance by reducing reciprocating weight.

Lucas fuel-injection mounted on a 1600 engine

It would be too complex to make a new head, so I would bore out the ports and have aluminium tubes pressed in to seal them. I would move the two LH rear mounting bolts to allow for better port diameter (and probably the two RH front ones). I would consider reducing the included angle between the valves which would be larger, probably 42mm and 38mm; this would mean a great deal of welding and machining and also special rockers – the camshafts would be special anyway. The inlet valves would be of titanium and I would use titanium valve caps. Dual ignition would be nice to have but probably impossible to arrange. The vertical installation of the engine would allow a straight inlet tract to accept the throttle bodies. I would continue with the Lucas injection, but this would be mounted at the rear of the head, driven from the inlet camshaft – the vertical engine installation would allow room for the metering unit to clear the cross member that contains the front spring (which would be composite instead of steel or possibly not there at all!). To provide more room around the engine I would mount the alternator on the back of the gearbox. In fact there would probably be a six-speed dog clutch ‘box with limited slip differential. The vertical engine would allow plenty of room for a proper exhaust manifold which would be developed on the dynamometer together with the fuel injection calibration and ignition curves.

The aim would be around 190 hp at around 7500 rpm with the engine safe to over 8000… These would be very expensive horsepower indeed when one considers that 180hp are relatively easily extracted from the 8-valve Lotus-Ford 1558cc twin cam engine that is older than the Fulvia 1600 in design terms, a fact that almost takes us back to the beginning of this series of articles.

My thinking is that all the modifications listed above could have been done in 1970; I believe though that I would be unable to resist installing digital programmable ignition – the alternatives are simply inferior.

I should add that I have similarly radical ideas for the rest of the car in my dreamland. Would it still be a Fulvia? I don’t really know. In the end, it all depends upon how you define “Fulvia”.

To me it would be.

I hope that you have enjoyed reading this series - I look forward to comments and criticism.

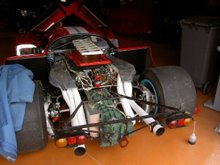
A pair of much-modified Fulvias at a Goodwood track day

Photo: Morgan Jones

Fulvia Developments - Part VIII

Well, this large project is now drawing to its conclusion ...

This time more on the engine's mechanicals and one or two other bits.

Cylinder bores should be finished with a “Flexhone” tool. This superb device that looks so simple (some people call it the Christmas Tree) provides a wonderful finish and reduces the need for running in to an absolute minimum. Piston rings should be treated this way too to provide a 45-degree cross-hatch finish.

A 1600 block showing the fine “Flexhoned” finish

If you are rebuilding using an un-rebored block then check the piston clearances before fitting the rings and select the pistons for the optimum clearances for each cylinder

The oil pump is another component that must be carefully checked. Maximum clearance between the rotors as specified is 0.12mm – about 0.005”. I know that the pumps work fine though even with 0.20mm (0.008”) clearance but this is not ideal. Precision rebuilt pumps are available from Huib van Guernink at http://www.viva-lancia.com/ on an exchange basis.

This is a good opportunity for me to let off a bit of steam about oil pressure, always a popular topic. So many people seem to think that the higher the pressure the better. This is nonsense. 65lbs/sq. in. or 4.4 kg/sq cm. is plenty – and it was good enough for the F1 V8 BRM… In fact the Lancia factory specification is 4.0 – 5.0 kg/sq. cm. (57 –71lbs/sq. in.) at 4500rpm and 90 degrees, with just 0.4 – 0.5 kg/sq.cm. (5.7 – 7.1 lbs/sq.in.) at idle at the same temperature; Lancia obviously agreed with BRM! Running higher pressures wastes power, wears the oil pump and heats up the oil unnecessarily. Do not rely on the standard gauge; usually these are pretty inaccurate and only suitable as a guide. Better to fit a proper mechanical gauge.

Most Fulvias are fitted with a fixed oil pressure relief valve, so no adjustment is possible without modification. It is not uncommon to find an engine with higher pressure than normal (when checked with a proper gauge of course). This can be due to someone who, having found the little oil sprayer at the front of the crankcase to be broken, has blocked up the outlet with a self-tapping screw, a good solution but one which will raise the oil pressure, especially at low engine speeds. High pressure at high engine speeds will be due either to a malfunction of the relief valve or perhaps restrictions in the system – maybe gunge collected in the crankshaft, which should of course have been cleaned out!

Cooling System

The standard Fulvia radiator is not particularly good; it is also very heavy. If a suitable aluminium replacement can be found I would suggest that it is a good idea to install it.

The thermostat is specified to allow the engine to run at 70 deg centigrade (158 F). I believe that the engine will make a little more power if run at a slightly higher temperature. I do not think that screw-in thermostats are easily found other than in the original value. One option is to fit a hose mounted unit (in the top hose of course). These are available in a variety of values; I suggest 80 – 85 deg. as being most suitable. The standard electric temperature gauge is quite accurate and may be relied upon.

S1s benefit from removal of the beautifully-made but noisy and wasteful mechanical fan. I have no figures but I would not be surprised to learn that the fan might cost as much as 2 – 3 hp at full speed. Furthermore, the action of the fan slows down the warming-up process which increases engine wear. An electric unit should be fitted, arranged to switch on at about 95 deg.

One other option would be to do away with the water pump. I recently saw a hill climb car here in France that used an electric water pump found on a Renault bus in a scrap yard. This would be controlled by a thermo switch and relay just like the cooling fan and I believe that more power would be saved and warm-up time further reduced.

Crankcase Breathing

I have mentioned above and elsewhere that the breathing arrangements on the Fulvia are inadequate. It was no accident that many of the works cars had an additional breather fitted to the cam cover. As I remarked in the article about the mid-engined special, I know of a case where a modified 1600 engine had its output increased by 5 hp through the fitting of a dry-sump system.

The little oil filler “pot” contains some sort of steel wool which rusts and finds its way around the engine. At Evolution we used to cut them open, remove the rubbish inside and replace it with stainless steel pan scourer material and weld the unit back together. One modification I considered was to fit a small pump that would positively ventilate the crankcase; short of a proper dry-sump installation, I think that this might be the best approach.

Well, that concludes my eight-part series on some thoughts about the Fulvia's engine and how it may be developed.

Well - not quite: there is Part IX...

Thursday, February 08, 2007

Fulvia Developments - Part VII

Here we are again - this time looking at some mechanical aspects.

Other Engine Work

All the preceding sections covering modifications quite naturally took the assumption that an engine would be in good order before modification. Increased power and torque will quickly “find out” a tired engine.

Once again, standard practice applies here.

For best performance, mechanical losses must be reduced to a minimum. One must be realistic of course and I doubt that many would wish for example, to polish their crankshafts down so that bearing clearances were at or above the maximum.

A 1600 crankshaft, clean but awaiting polishing of the journals

Nevertheless, attention should be paid to all running fits. You probably know that the crankcase must be bolted to the block and correctly torqued down before the main bearing caps are tightened to specification. The crankcase is very – even pathetically - weak and in the past, I have had to reject a number of 1600 crankcases owing to distortion: on tightening the main caps I found that the crankshaft would not turn freely. The crankshaft itself should also be checked in a lathe with a dial gauge to ensure that it is true. Usually with Fulvia engines the crankshaft nearly always seems to have a little “stiction” when one attempts to turn it by hand. One engine I built for a Fanalone had a lovely free-turning crankshaft and the engine spins up very well. The engine must have had a one of those rare “good” crankcases.

Never forget that these engines are old! The connecting rods are frequently oval at the big end. To check this aspect, torque up the big end cap (without the bearing shells of course) and check for roundness with a bore gauge. If the aperture is “out of round” significantly (say more than 0.0015” – 0.038mm or even less) then you do have a problem. The problem is that nothing can be done about it realistically owing to the serrated finish on the cap faces although it is worth trying different torque settings within the specified tolerances – or even slightly beyond - as this can sometimes result in an improvement. With flat faces of course as found on many other engines, the faces can be machined and the rod bored round again. If the ovality is not addressed, then bearing trouble will be the inevitable result I am afraid.

If you do manage to find a good set of rods, then have them balanced end for end and have the pistons balanced too. The factory specified a 4-gramme tolerance for pistons; this is not quite good enough – 1 gramme is good and less, better! Consider that a piston and rod which at rest weighs say 700 grammes, probably weighs about two tons at 6000 rpm at the top of its stroke (I read this in a book somewhere). That means it weighs 2857 times more that it does statically. Of course errors are partially compensated for by the adjacent piston which is at the bottom of its stroke, but study of reciprocating engines will show that all is not equal and opposite so it’s best to balance thoroughly.

Given the age of the parts, it is quite a good idea to have the rods shot-peened although I have never heard of a Fulvia rod breaking, nor have I ever met anyone who has! I suppose that I should add that the works did produce a special rod for the 1600 so I imagine that they had rod trouble at the very high revs that were used on the low-geared rally-cars. The part number was 2276699 – good luck! The bolts should be removed and peened also. For 1300s, 1300HF bolts are superior (they are of a similar design to the 1600 ones) and can be obtained from Cavalitto.

Bearing clearances should be checked on assembly: “Plastigage” is an excellent product for this job and easy to use. If the clearances are on the tight side, then have the crankshaft polished as necessary.

One small improvement worth doing and standard practice in “blueprinting” is to improve the oilways. Looking at the oilways behind the main bearings, you will see that the outlets have sharp edges – i.e. as drilled. These should be radiused; this will improve flow and slightly reduce the work that the oil pump has to do.

Next time - more mechanical stuff

Saturday, February 03, 2007

Fulvia Developments - Part VI

Fuel System

I have not a great deal to say about this important aspect, since choice is so limited for the Fulvia – at least if one wishes to preserve a “period” quality. The best solution technically would be full digital engine management with throttle bodies, fully programmable, and which would include the ignition system. With this type of equipment, rev-limiting and traction control are possible and the whole thing can be set up quite quickly on a rolling road. However, many would agree with me that this sort of equipment doesn’t belong on a Fulvia.

So for 99.99%, “fuel system” means carburettors and for most, Solexes (ugh!). The Solex carburettors fitted to Fulvias were poor quality and now after more than 30 years minimum, are frequently worn or rather, worn out. Since Solex went bankrupt years ago (sadly after the Fulvia and not before) parts are not easy, although overhaul kits are not hard to find. Those who have modified their cars will need to alter the jetting. Main jets can be bored out (drills in 0.1mm steps are easily found) whilst air correction jets, which will normally need to be reduced in size, can be soldered up and re-drilled. And don’t forget that with the absurd Solex design, the carburettors must be removed in order to change the main jets, not very practical for rolling-road tuning sessions.

The standard air cleaner arrangement is very restrictive. The best solution is to cut out all the metal inside the cover, weld up the hot air flap and cut back the inlet pipe to accept a piece of hose into which a modern cylindrical air filter may be fitted. The filter should be mounted to pick up cold air somewhere behind the right-hand headlamp. I performed this modification on a 1600 and the owner complained about an enormous flat spot at about 3000 rpm. Changes to the air correction jets cured the problem after which the car went better than ever, and proved that my view about the restrictiveness of the air filter was correct.

Some Fulvia 1300 owners are fortunate to have the vastly superior Dell’Orto DHLB 35 carburettors. These are proper quality, rare, expensive and worth it. I do not agree with many who consider them to be a satisfactory solution for the 1600 as they are too small in my view for proper top-end performance; what a pity that Dell’Orto didn’t make a 40DHLB! The flat spots many experience with the 42mm Solexes (on 1600s) are mostly caused by wear in the spindle bearings and other problems rather than any fundamental shortcoming in specification.

The other route for the better-heeled is to opt for Weber DCOEs or Dell’Orto DHLAs as used on the factory cars. These are much larger and require either a special manifold or a suitable adaptor that fits to the original component. These manifolds are produced but most that I have seen are poor quality and one I had to install would not even fit the car until I had filed and ground large amounts from various surfaces. And then I found that the casting was porous – and the owner had paid £300 for it. Disgraceful. The nicest solution that I have seen was the adaptor fitted to the 1972 Monte-Carlo winning Fulvia – “No 14”. This attractive piece was designed, I believe, to accept the 48mm Dell’Ortos fitted at the time, but look closely at the picture and you will see that the car is now fitted with 45mm Webers. 40 or 45mm carburettors are readily available with 45s being the most popular choice. However, I have driven a 1600 fitted with 40mm DCOEs and I must say that it went very nicely, with noticeably good torque.

The excellent adaptor manifold fitted to Sandro Munari’s famous No 14

One problem with using these large carburettors is that they leave little or no room for a cold air box and all the installations that I have seen draw hot air from behind the radiator thus reducing both volumetric efficiency and effective octane rating (hot air is “nearer” to detonation than cold air). Some works cars had curved rearward-facing trumpets which I presume were an attempt to tackle this problem

One carburettor idea that appealed to me was to use four 40mm Amal or Kehin motor-cycle carburettors. Organising the throttle linkage would be challenging to say the least and the carburettors would be expensive, but I like the idea of a slide rather than a butterfly and I know that some racers (though not with Fulvias) had considerable success years ago with Amals.

A 1300cc fuel-injected Fulvia engine with slide throttles
Photo source unknown

The final option is to use period fuel-injection equipment. And despite the fact that I love the Lucas system on my own car and also that I was involved in arranging a Kugelfischer system on another Fulvia, this approach can hardly be recommended as a realistic option – except for the very determined. Carlo Stella’s Competizione shows what can be achieved with proper development.

After all, I realise I wrote rather a lot - ah well, I do tend to ramble sometimes.

Next time: The first part on engine mechanical aspects.

Tuesday, January 30, 2007

Fulvia Developments - Part V

And now the subject that I have always found so fascinating…

The Exhaust


And we thought that the Fulvia was tricky!
A 1925 supercharged 2-litre V12 GP Delage engine

The first word on this topic is: DIFFICULT

To begin with, the engine installation does not allow adequate space for the exhaust manifolding and from here on it doesn’t get any better!

The standard Fulvia manifold is a poor thing indeed. Its internal diameter at 32mm is too small; it has “blended” junctions which are not good, and it has very unequal length primaries. Matters are worse on the 1600 since the only difference is the fact that 1600 manifolds are made of stainless steel, presumably to cope with all the heat; I have seen them red hot. Incidentally, some of the replacement exhaust systems are even worse. At least the originals had proper bends. I have seen some systems where there is considerable necking at the curves; such systems are rubbish and should not be used - let alone sold; the original is already too restrictive.

Certain suppliers do offer special manifolds but I have never seen one I liked, all being more or less copies of the works ones that I have seen, which did not impress me either. Of course all offer a good improvement on the inadequate original, but they could be so much better! Whilst I was manager at Evolution Engineering in London, I organised the development of an improved manifold. At the time we had a customer who was fed up with the after market “Group IV” manifold fitted (!) to his car. It didn’t fit! I told him we could do a bit better, so we borrowed his manifold to get a basic idea of the layout and set out to produce a better one, in stainless steel. A considerable time was spent making a pattern which was then passed to a specialist company to manufacture. The enormous trouble I had with this is quite another story…

A stage in making the pattern, using a mocked-up engine and gearbox as a jig

In the end, the manifold was a success. As may be seen from the pictures, instead of blended junctions as used by the works, we incorporated collectors. It was fascinating to fit the first one to our customer’s car. The first thing we noticed was that the exhaust was quieter; I put this down to controlled expansion at the collectors. However, what gave the greatest pleasure was hearing the customer tell me about the substantial improvement in torque that the system provided, especially since this is precisely what I had forecast.

The Evolution Engineering Fulvia manifold (before the fabricators corrected the errors)

Collectors are the only proper way to join pipes

As an historical aside, some of you may remember the story of the (eventually) very successful Vanwall grand prix cars in the 1950s. They used an exhaust manifold that was pretty advanced for the time and observers remarked how quiet the cars were. The irascible Vanwall boss Tony Vandervell, loved to tease the Ferrari team with their Lancia-derived V8s, by 1957 a bit outdated. He pointed at the Ferrari exhaust pipes from which a colossal noise was emitted and joked, “That’s where your power’s going”!

When producing parts for after-market sales, one must consider the installation of the parts and so the Evolution Engineering manifold was designed to be a straightforward fit and to mate with the standard exhaust system. The enthusiast who is able to accept something more challenging in this regard has more freedom in choice of design. The picture below shows a home-made manifold that I know worked very well indeed. To fit it though, the head must be removed and the engine tilted slightly. It runs over rather than under, the left-hand driveshaft. The manifold was made by welding together numerous bends cut from spare or second-hand exhaust systems. The collectors were simple fabrications in sheet steel, whilst the flange was an original from a scrap manifold machined to accept larger primaries (35mm bore).

A very effective home-made 4/2/1 exhaust manifold featuring long primaries

Finally in this section, a few observations about manifolds. If you decide to make or perhaps specify your own, remember that the aim is to have all the primaries, i.e. the pipes that lead from the ports, equal length – with respect to the exhaust valve, so the Fulvia’s unequal length ports must be allowed for in the design. Whilst I have a four-into-one manifold on my car, a 4-2-1 is really better (with primaries 1 & 4 and 2 & 3 being coupled together of course), both for tractability and for ease of fitting. Curves should be smooth and all bends must be mandrel bends with no “necking” so often seen on poor-quality replacement systems as I remarked above. The 2-into-1 section should be of such a length so that when added to the primary length, the total is the tuned length that is to be employed. For most Fulvias I suggest something between 28 and 36 inches (71 – 91 cm). A good compromise is to make the primaries about 16”(41cm) from the exhaust valve so that the second (2-into-1 section) should be between 12 and 20 inches (30 to 50 cm.) long excluding the length of the collectors. Collectors should be constructed with their sides at an included angle of around 14 degrees and it is essential that the pipes are cut off cleanly where they enter the collector – it is even better to have a tapering “tongue” that enters the collector but this is tricky to make). Internal diameter of the primaries should be 1 3/8” (35mm) and of the secondaries 1 1/2” (38mm). In a perfect world, the length of the single pipe which follows the 2-into-1 collector, should be the tuned length when it meets the silencer. This is usually impossible on a Fulvia for clearance reasons. Perfectionists could employ a small expansion chamber here… The internal diameter of the single pipe should be 2” (51mm) or perhaps a little more.

I make no excuse for writing at length on this subject, which really deserves at least another 1000 words! I believe the exhaust to be critical in getting the best from an engine and given the inadequacy of the standard arrangement on the Fulvia, something that should be dealt with as a priority even if it is difficult and expensive.


Next time, I take a look at the fuel system

Saturday, January 27, 2007

Fulvia Developments - Part IV

I finished the last part talking about valves; now I will have a look at the valve gear


Valve gear

A valve spring has a tough job - especially at high speed. Not only does it have to lift its valve up very rapidly and of course, repeatedly, but it also has to lift the rocker. We cannot do anything about the valve (without resorting to titanium for the inlets) so what about the rocker? Reducing reciprocating weight makes life easier for the spring and will raise the engine speed point at which valve float occurs.

Remove a tappet screw from a Fulvia rocker and you will usually find that the threaded hole is not in the centre, meaning that there is a lump of useless metal flapping up and down at the end of the rocker where the reciprocating weight is greatest because of the length. Rockers can be dramatically lightened. There is no point in working hard on the pivot point where the rocker runs on the shaft, since there is no significant reciprocating effect there. And no metal should be removed that reduces the height of the rocker. Have a look at the rockers on the high-performance American V8 engine in the picture – the upper and lower edges are almost but not quite, sharp; there is no surplus metal and they are a good indicator of what a rocker should look like.

A very “hot” Chrysler “hemi” installed in an American dragster

source: Petersen’s Hot Rod series: "Cams, Valves, Exhaust Systems”

I spent a long time with Swiss files on my rockers reducing their weight. I then polished them with abrasive paper and had them shot-peened – I consider this essential for rockers that have been modified since they are forged components, and lightening and/or polishing removes the tough “skin” on the surface which must be replaced by peening (those who like the idea of polishing con-rods might care to consider this point).

Those with 1300 engines should try to find a set of 1600-type valve caps; these were drilled and thus lighter. Alternatively, titanium caps are available from Huib at Viva-Lancia.com.

Fulvia engines are old, the years do take their toll; this is very noticeable in the valve gear. Tappet screws become “mushroomed” at the ends, depressions appear in the tops of valves and needle tappets, and the hardened pads on the rockers that run on the camshafts also wear. Some of these problems can be addressed: the screws and rocker pads can be reground to shape, but I have no easy suggestion concerning the rocker shafts; these wear quite badly. They are made of material which is very hard or I should say, heat-treated for hardness. It is probably possible to have them chromed back to size and centreless-ground, which would be costly but probably not as expensive as having new ones made from scratch.

The only satisfactory solution for the valves is to replace them. In any case, the valves fitted to 1300s were not of the highest quality although quite satisfactory in normal use but perhaps not with unleaded fuel. Modern valves are generally made from 21/4N (I do not know the European Standard designation) an austenitic stainless steel specially developed for valves. The original exhaust valves fitted to 1600s were made of an exotic material, Nimonic 80, an alloy that has very little iron in its composition; it is mostly composed of chromium and nickel. Henry Wiggins & Co in England developed the “Nimonic” series of “Super Alloys” during the Second World War for use as turbine blades in jet engines. 21/4N is a perfectly good substitute and quite possibly better for exhaust valves. The first recorded use of this material for exhaust valves that I have been able to find was in the Coventry-Climax F1 V8 engine of 1962.

There are materials that are even superior to 21/4N but I cannot imagine that they are necessary in a Fulvia.

Because of the high contact loads applied to the tops of the valves by the small tappet screws, a very hard tip must be added. This is usually achieved by friction welding. The hardness should exceed 60 Rockwell “C”. The tips are usually made from some sort of high-grade tool steel.

Since the Fulvia uses bronze valve guides, it is not necessary that the valve stems be chromium-plated.

A set of valve guides prepared for a Fulvia.
Note the taper on the inlet guides to improve flow, whilst
The exhaust guides are left straight to help them cope with the heat

Series 1 Fulvias used valve guides that did not have valve stem oil seals and there is no provision for them, whilst Series 2 cars did. I imagine that the S1 guides were especially finely honed. The best material for guides is nickel-silicon bronze; one trade name for this material is “Colsibro” and at one time at Evolution Engineering we used to make our guides from Colsibro bar. Later for the Fulvias, we bought valve guides specified for the Mercedes-Benz 190 Cosworth 16V. These are perfect for the Fulvia, having a safety spring clip and being made from the correct type of bronze. However we had to machine them to accept the normal valve stem oil seals as the Mercedes-Benz ones were a different pattern.

Finally we used to modify Lancia 16V guides (see picture above). Once again they are the correct material and accept the oil seals. Incidentally do not use the seals normally supplied in the Fulvia gasket sets. Use Integrale or Thema ones or similar. These are made of silicone rubber and do not harden with age unlike those normally supplied. I never fit seals to the exhaust valve guides as I consider it unnecessary and a little oil is probably a good thing for such hard-working components.

Camshafts

The standard 1.3S/1.3HF/1.6HF camshaft (all the same) offers 56 degrees of overlap and duration of 274 degrees. In many engines of the period, this would have been considered a high performance specification for a road car - even a bit “wild”. I have found that in modified engines the original camshafts work very well indeed; various suppliers offer different Fulvia profiles but I would consider the camshafts the last thing to change in a development programme. For more information, see “Fulvia Thoughts 5” on this blog.

Next time, The Exhaust

Thursday, January 25, 2007

Fulvia Developments - Part III

Some Development Ideas

Having outlined some of the limitations of the design in my two previous articles, I will now offer some suggestions as to how the performance of the Fulvia may be improved. These are based almost entirely on experience of modifying Fulvias on a restricted budget; I have not had the opportunity of tackling a “carte-blanche” project!

Before I begin I should like to set some terms of reference. These ideas and suggestions will be general rather than very specific. Every engine has its own requirements in such areas as fuelling, ignition and cam timing.

Cylinder Head

A gas-flowed 1300 Fulvia head – note the dowels to locate the manifold accurately

As with almost any engine, one should start with the cylinder head. The original fit and finish on the head and its associated components is not perfect – more so on S2s than on S1s of course. All the normal procedures apply and I expect that to many of you they are well known.

Match the inlet manifold to the head and dowel it to ensure accurate repeat fitting. Match the carburettor mounting rubbers also; there is usually a nasty “step” at this point.

Gas flowing a Fulvia is a tough business, first because of the two long ports on each side and second because of the hard, high-quality aluminium alloy used. The usual method requires the use of a good die-grinder with a long “snout” that will allow full access. Tungsten carbide burrs can be used – with care – to “rough out” the valve throats, flap wheels of 60 grit are used for the ports and for the throats but these have to be reduced in diameter before they will enter the ports. A “split stick” with 150-grit paper is used for finishing. Normal practice on the inlet side is to work at the ports until their diameter is about 85% of the inlet valve diameter. This is possible on a Fulvia with standard size valves or even slightly bigger ones. I normally remove all of the boss around the valve guides although one experimental head I did featured a modified boss on the inlet side to provide a “twist” to the incoming charge to ensure better homogeneity of the mixture. I understand it works quite well. Either way, the principal result of this work is greatly improved torque – and I am convinced that much of the benefit comes from the exhaust side. Considerable improvement can be made to the inlet manifold by careful attention. In general I recommend that anyone who fancies trying gas flowing should a) practise on a scrap head and b) read a decent textbook about gas flowing theory – actually in reverse order!

The valve seats should be cut to three angles – for the valve seat itself I prefer 45 degrees to the 30 degrees found on 1300 inlet valves and on both valves on the 1600. A radiused seat is better still (inlets only) and the exhaust seat should be about 1.5mm wide, no more. On standard heads, the seat area can always be considerably opened up greatly improving flow. The inlet seat should be on the edge of the valve and 1mm wide. Careful work on port matching and valve seats and throats probably yields about 75% of the improvement obtained from a full gas flow job.

Seat cutting with a Serdi machine

Larger valves can of course be fitted, but not much larger without drastic changes by which I mean enlarged inlet valve seats. It is a simple job to use 1600 valves in a 1300 head, but of course this represents only a 5.8% increase in valve area; on the other hand every little bit helps.

Important: if you fit larger valves then it is necessary to enlarge the cut-outs in the piston crowns; failure to do this (certainly on 1600s) will result in bent valves and damaged pistons. I have a good procedure for doing this – contact me for details.

Remember that if much larger valves are to be used, the seats will have to be cut deeper and this will mean that the installed height of the valves will be incorrect leading to possible valve float problems unless the valves are correctly specified. Small changes may be corrected with hard washers under the springs. It is however, debatable whether, with the limited port size, any significant benefit will be obtained. In my own engine I have 39.5mm inlet valves and 37mm exhaust valves. The exhaust valves were really a whim as I had some good quality austenitic stainless 1300S inlet valves available and just decided to give the idea a try. Luckily (as it was rather a one-way operation) I detected a small increase in torque in the mid-range and that was it – no money for dyno sessions at the time!

Next time: a look at the valve gear

Tuesday, January 23, 2007

Fulvia Developments: A New Series of Articles

Bonjour, good morning/ afternoon to all.

Here is the first part of a series that I have been writing over the past couple of weeks. I expect that some of the content may be disputed or even controversial, so be it - I await comments, criticism etc. as usual. I also await your custom!
***************************

Fulvia Engine Developments

Part I

Background and General Considerations

Gas-flowing: the early stages

Over the years, I have been asked many times about increasing the power output from the Fulvia engine. I usually point out that there is no simple route, for reasons I shall try to explain later in this series of articles.

In fact in standard form, the Fulvia was remarkably powerful in its time – that is in specific terms, with roughly 70 hp per litre; few of the Fulvia’s contemporaries could boast such efficiency. I well recall my amazement when, driving with two friends in my first 1300 S2 coupe at 100 mph, I was able to converse without shouting! I sometimes think that for those who use their Fulvias only as road cars, pursuit of extra power is rather pointless. After all, the process is very labour-intensive and consequently expensive and naturally the car’s character will change. I have also observed that efforts to improve the driver’s performance could be cheaper and more effective; a Fulvia in the right hands is still quick today from A to B. And as standard and in good order, it is a lovely car.

Nevertheless, there are always those who wish to develop the car either for the sheer hell of it or for competition purposes and it is these to whom this article – or rather, series of articles – is addressed.

**************************

Before examining the Fulvia I would ask you to consider the engine in the old Mini. Here we have a cast-iron motor that can trace its origins back to about 1948 or perhaps even pre-war. It has vertical valves side-by-side in its cast-iron head, long push rods, long stroke (except for the 970 and 1071 “S” cars) two siamesed inlet ports and three exhaust ports, with cylinders 2 and 3 having to share the middle port. Read any engine theory book and you will see that theoretically this recipe is hardly promising. Despite this, a number of tuners have obtained more than 100hp/litre from this engine in various sizes, running at around 8000 rpm and this was some years ago; they are probably doing even better now.

Very well, let’s consider the Fulvia’s engine: short stroke, twin overhead camshafts, valves inclined at 60 degrees included angle, light valve gear, nicely shaped combustion chambers (similar to Porsche 911) one carburettor choke per cylinder, aluminium cylinder head, high compression and so on. And unlike so many production engines, there is a fully counter-balanced steel crankshaft, forged rods and rockers etc. One could be forgiven for thinking that the sky’s the limit. Sadly this appears not to be so. Here are some horsepower figures:

Works Gr IV 1600 Rally car 1972/3: 1599* cc – 158hp

Special prototype 1300 engine – 143hp†

*Works cars were generally bored to 82.4mm

† Quoted in “Lancia Racing” by Nigel Trow

I should add that I have been told by someone who claimed to have seen the factory papers that in fact Lancia never got more than 150hp from their 1600cc rally cars. And I am sure that the special 1300 engine mentioned above was very much a one-off. And the same source told me that he had it on good authority that quite frequently at the factory in the old days there would be an explosion from the test house quickly followed by a number of excited Italians running out… The problems of trying to get big power from a Fulvia…

Two more Fulvia examples:

1300 Sport Competizione (owned by Carlo Stella)

This car was extensively developed in 1972 by Baggioli and Gottfredi and is fitted with Kugelfischer fuel-injection (See Stella’s book on the Competiziones).
It develops “around 144hp” at 8500 rpm (111 hp/litre)

Finally, my own car developed with no money of course!
1599cc, 11.5/1 compression, special camshafts, big valves, Lucas fuel-injection, special exhaust etc.; about 145-150hp at 6700rpm (90.6 – 93.8hp/litre). I should add it would probably be a bit better if I had the time and money to calibrate the injection, make a new exhaust system etc.

I mentioned the Mini engine above; here’s another period competitor:

A very powerful FIAT 128 engine with Kugelfischer injection

Source: “FIAT 128 La Storia etc.” pub. Sileagrafiche

FIAT 128. 1300 c.c. single overhead camshaft, wedge-shaped combustion chambers, cylinder dimensions 86 x 55mm. Italian tuners such as Trivellato extracted up to 160hp (123 hp/litre) from this engine, which would run at 9,000 rpm with its standard cast-iron crankshaft and over 10,000 with a steel one. Incidentally at high revs they sound glorious!

*******************

Next time: A detailed look at some of the limiting factors (from a developmental point of view) of the Fulvia design


Sod the Law!

SMOKING IS NOT ONLY PERMITTED ON THIS BLOG - IT IS ACTIVELY ENCOURAGED

New Internet Speed test

Music and Radio Blog Club

Radio Blog Club, a good friend for a while appears to be in some legislative difficulty...

However, in tribute to its brave effort, I shall leave the existing track on this page (which amazingly still works)

Sadly my Playlist no longer works (hence its removal) thanks to the absurd "Hadopi" legislation in France. Apologies to all.